
Welcome to the Network Engineering Domain
Pape O. Fall's Blog
One of the main feature that sets aside Juniper SRX is its capacity to operate in two different modes: Packet Mode or Flow Mode. However, the use of both modes is available starting with JunOS 9.6. Traffic is selectively marked in packet mode forwarding via the packet filtering function while unmarked traffic is by default treated via the flow based forwarding module.
In Packet Mode, the Juniper SRX processes traffic on a per-packet basis. This is similar to how a traditional router functions where packets are processed individually and forwarding decisions are made on a per-packet basis. The main advantage of this mode is that the processing type is stateless, meaning that the router does not subsequently keep track of session information or go through traffic analysis to determine how session are established. This method optimizes packet processing specially if the forwarding plane is done in ASICs.
In Flow Mode, a more granular traffic control is achieved by analyzing the state or session of the traffic. The Juniper SRX adopts a session based processing approach where it pretty much functions as a stateful firewall where traffic is inspected at the transport level with the use of source and destination match criteria. An action has to be specified as to how the packets matching the session are to be treated. Any other incoming packets will undergo the same action as long as they match the initial session.
The quickest way to illustrate this in this blog, is to setup a point-to-point link between a Cisco router and a Juniper SRX. In Packet-Mode, I should be able to generate and receive ICMP responses from the far side without any additional policy. However, in Flow-Mode, I shouldn’t be able to receive ICMP echo responses unless specified in the security policy.
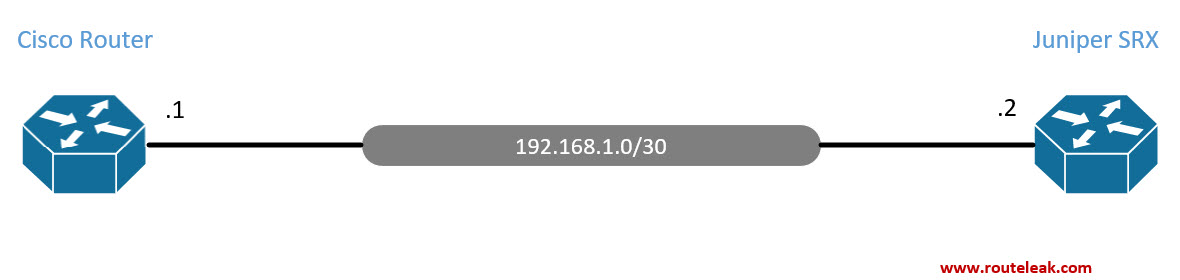
We’ll use the very basis setup below where we the Cisco router has an IP of 192.168.1.1/30 and the Juniper SRX has an IP of 192.168.1.2/30.
Let’s first setup the IP address of the Cisco Router

Great ! Let’s hop on the SRX and configure its IP address

Great ! Now that we have both IP addresses configured and both state and protocol are in the “up” state, then I should be able to ping across given that there are zero policies configured and this is a point-to-point link.
Let’s give it a try…

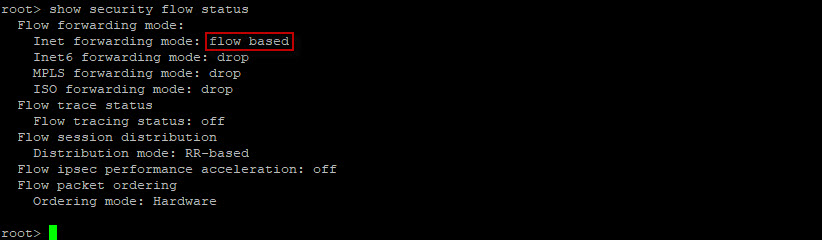
Here we can see that we can’t get a response from the SRX from the Cisco router. The reason is that the model and version of JunOS we are running on the SRX has a flow based forwarding mode enabled by default. Let’s check that through the CLI…
In order to establish a session between the devices, we’ll need to place ge-0/0/0 into a specific zone and apply a policy allowing or discarding traffic to the interface or through the firewall. The security policy in this scenario should be tied to the interface ge-0/0/0.
A security zone pretty much sets security boundaries within the network. Typically, internal interfaces are placed into the “Trust” zone and external interfaces are placed into “Untrust” zone. We also have the capabilities to name a zone and define security policies to either allow or restrict traffic to an interface that’s part of the zone or transit traffic from zone to zone. In our case here, we’re just allowing ICMP to the interface facing the Cisco router.
First let’s ensure there’s no security zones configured on this device.

As we can see above, there are no security zones configured on this SRX running in flow-based mode. Let’s now create a trust zone and map ge-0/0/0 into it.

Great ! Let’s confirm that the security zone has been created and that interface ge-0/0/0 has been added to the trust zone.
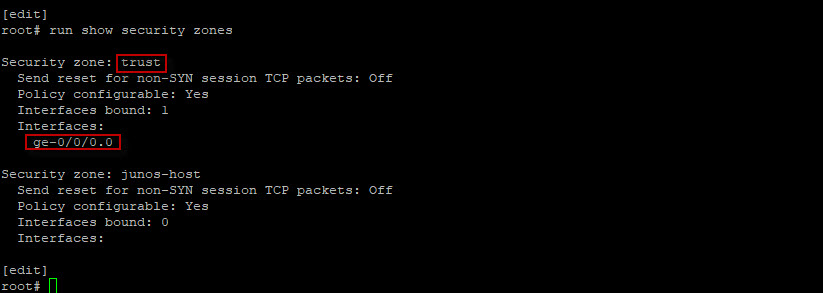
We’re in good shape here. Notice how under “Policy Configurable” it says “Yes”; This simply means that we can configure policies in this trust zone.
Since we’re already have ge-0/0/0 under the trust zone and that the SRX is running in flow-based mode, we’ll need a security policy to permit ICMP packets.
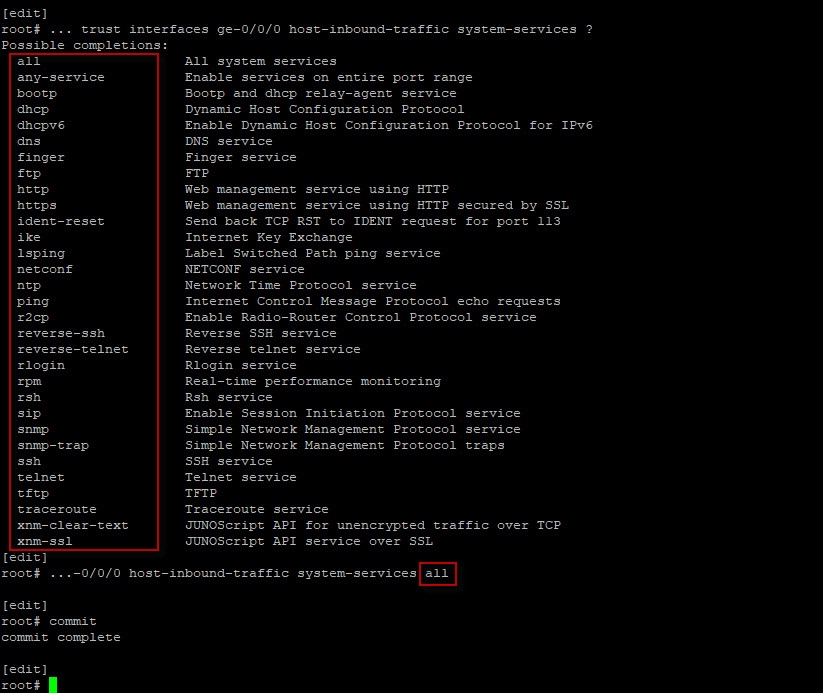
The command is “set security zones security-zone trust interfaces ge-0/0/0 host-inbound-traffic system-services all”. Notice how we have the option to choose from various system services including just ping. The configuration has been committed, let’s see if we can now ping across.

Great ! Let’s now delete the security profile of the SRX and turn the box in packet-based mode.
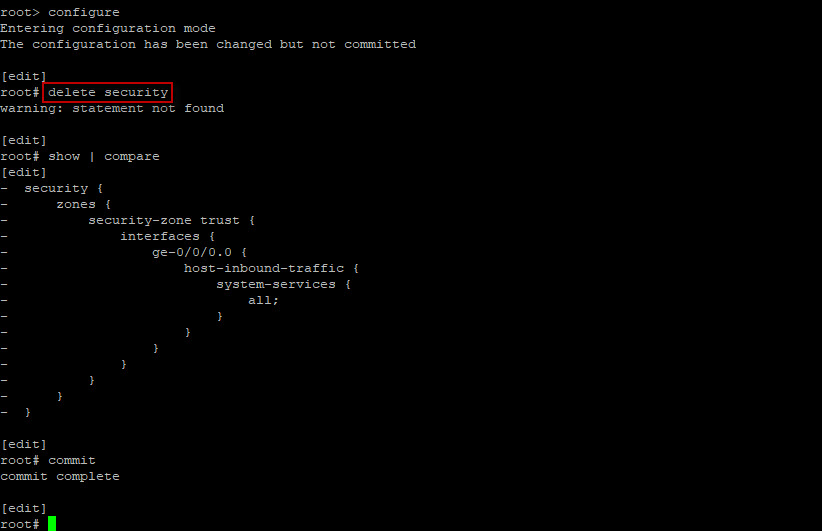
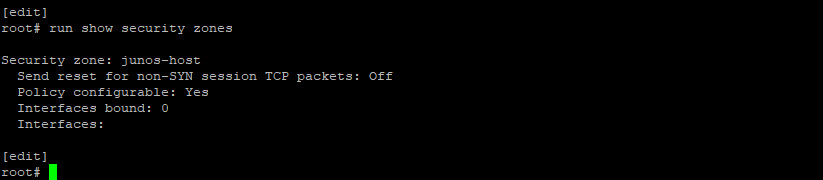
Okay. Let’s confirm that the trust zone has been removed from the SRX.
Very good ! Now let’s change the mode to packet-based using the following command “set security forwarding-options family mpls mode packet-based”.
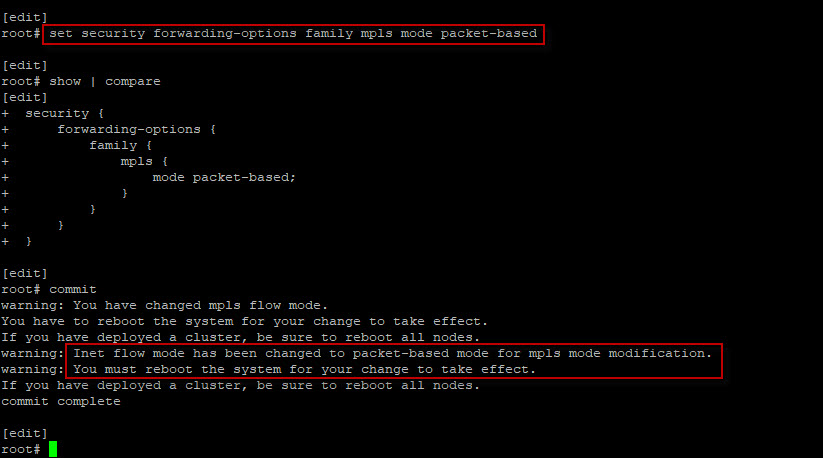
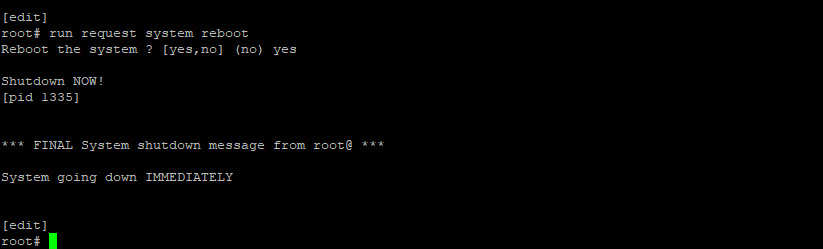
Notice how a reboot is required for the changes to take effect. Let’s do that.
Let’s now verify that the SRX is running in packet-based mode.

Good ! Let’s see if we can now ping across.

As you can see, it is successful in packet-based mode without any security policies.
That wraps it up for this topic. I’ll show next how to configure security policy in bypass mode. This will apply to traffic traversing the SRX from one zone to another while being subject to stateful firewall inspection.
Please let me know if you have any questions.
 Hello I'm Pape. My friends call me Pop. I'm CCIE #48357. I enjoy my field and love to share it with others. I love to write so I'm sharing my blog with you.
| M | T | W | T | F | S | S |
|---|---|---|---|---|---|---|
| 1 | ||||||
| 2 | 3 | 4 | 5 | 6 | 7 | 8 |
| 9 | 10 | 11 | 12 | 13 | 14 | 15 |
| 16 | 17 | 18 | 19 | 20 | 21 | 22 |
| 23 | 24 | 25 | 26 | 27 | 28 | 29 |
| 30 | ||||||
Leave a Reply