
Welcome to the Network Engineering Domain
Pape O. Fall's Blog
In this switching section, I will show you the basics of configuring VLANs on Cisco Catalyst switches as well as verification steps you can perform to ensure your configuration is accurate. The following is the diagram we will use for this purpose:

As you can see above, RouteLeak-RT01 is connected to RouteLeak-RT02 via RouteLeak-SW01.
First let’s check the vlan configuration of the switch…
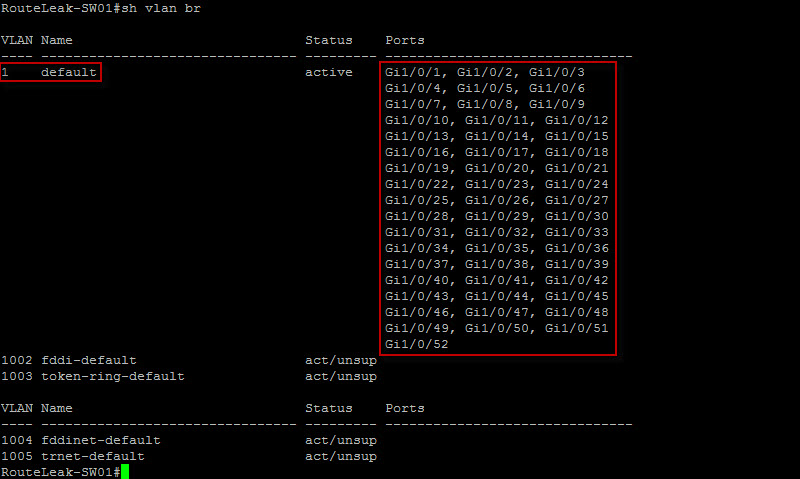
We can clearly see that all active interfaces are assigned to the default vlan which is vlan 1. VLAN 23 does not exist in the vlan database at this moment. Our next step is now to configure vlan 23 in the vlan database. Here is how we do it…

As you can see, it is fairly simple, right ? All we needed to do was to get on config mode and type “vlan” followed by the vlan number. It is also good practice to always set a name for the newly added vlan for troubleshooting purposes. Let’s now check if the vlan we just added has been successfully installed in the database…
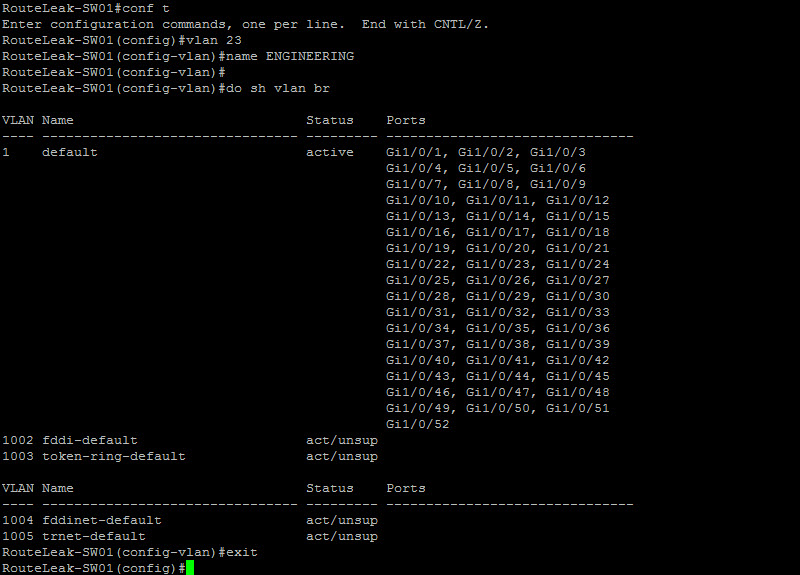
IT HAS NOT ! Humm… I wonder why ?! Well, let’s look at the output before this one. We can clearly see that the vlan was created but I’m still in vlan configuration mode. I wanted to bring this to your attention: You must exit out of the vlan configuration mode in order to commit the changes. Let’s exit and check again…
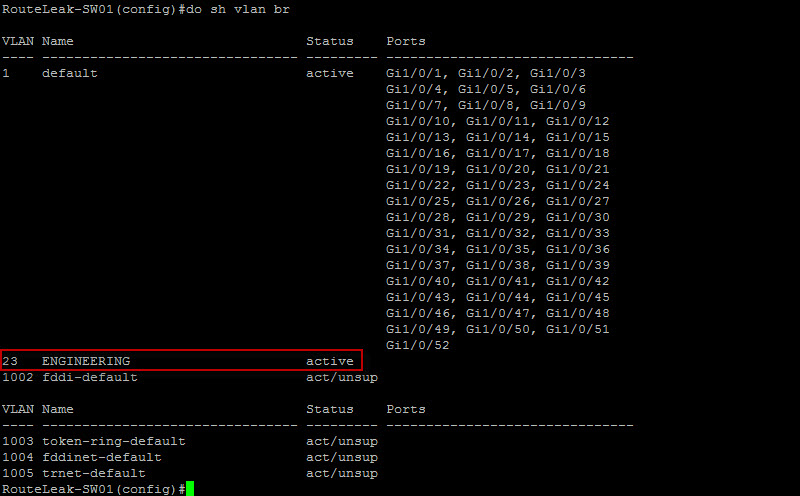
Ah ! That’s better ! Well, we got the first piece done but we can clearly see that there is no active interfaces under vlan 23 at this point. Based on the diagram, we need to place Gig1/0/1 and Gig1/0/2 under vlan 23. Let’s do that…

Done ! Now let’s run “show vlan brief” command to make sure the correct interfaces are in the correct vlan…
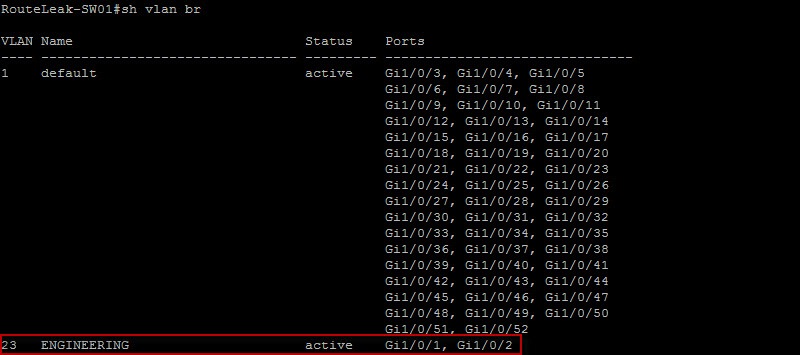
We are good. So at this point, we have our vlan configured and we also have our interfaces in the correct vlans. I’ve configured the IP addressed on the interfaces already so we should be able to ping across from either RouteLeak-RT01 or RouteLeak-RT02.
Let’s try to ping 10.1.1.2 from RouteLeak-RT01…

I don’t know about you but these exclamation points always put a smile on face. Now, let’s try to ping 10.1.1.1 from RouteLeak-RT02…

At this point we have reachability across which was our goal initially.
Quick Tips: When defaulting a switch, bear in mind that in order to remove the vlan information on the switch, you will need to delete the vlan.dat file in the flash. By default, vlans are not saved in the running-config or startup-config.
We should be good for today… I’ll talk to you guys later.
 Hi, I'm Pape ! Folks call me Pop. I'm CCIE #48357. I love what I do and enjoy making tech easier to understand. I also love writing, so I’m sharing my blog with you
Leave a Reply